How do you play music loud enough to hear good but not annoy your neighbors???? Use a FM transmitter.
 Transmitters can be purchaced in all sizes, power output, and sound quality. For 2006 we tried 2 types of transmitters. A Ramsey FM10 kit was built and tried out in September, however it didn't work as good as hoped. So we tried a Belkin Tunecast. This device is normally used in you car so you can listen to your Ipod across your car stereo. They were designed to transmit about 10-15 feet. Well our yard is about 75' to the street, and the transmitter wouldn't work. However the Belkin transmitters can be modified by increasing their antenna length.
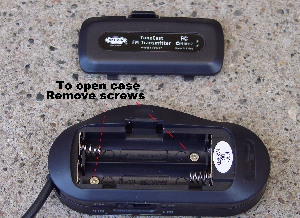 This is the back ot the Belkin Tunecast. When you remove the battery cover. You will see two screws. Use a #1 phillips screwdriver to remove both of them. After you remove them the case can be split at it's center seam. When doing this notice how the channel selector switch slider goes back in. When you get it apart the circuit board will now come out.
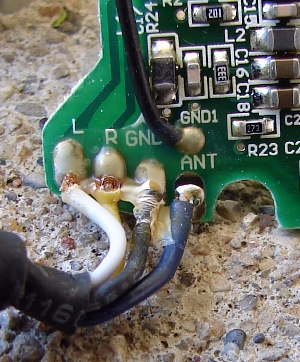 This is the bottom left corner of the circuit board. It has four wires soldered to it. There is left input, right input, ground, and antenna. They are labeled on the board under the wires. In this view the wires have been bent back out of the way for the picture to show labeling. I don't suggest doing this mor than once of twice or the wires will fatigue and maybe break. The wires are fastened in with hot melt glue. So the first step is to remove the glue from the antenna solder pad with an exacto knife. If you don't the glue will remelt make a mess and contaminate the solder pad making it hard to resolder the new antenna.
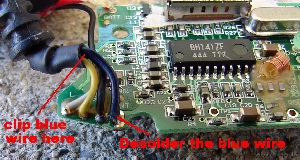 With the glue removed clip the blue wire where shown in the picture. Once cut get a soldering iron hot and grab the wire with needle nose pliers and desolder the wire. The new longer antenna wire can now be soldered in. The length is critical depending on its transmitted frequency. There are many websites that can calculate this dimension for you. Here's one, or you can do a search for antenna lenght calculators. My length for 88.5 FM was 31.73" so I soldered in a 20awg stranded wire 36" long then cut it to length. I used this frequency because there are no stations for 100 miles using it. The Belkin modifiedwas more than powerful enough to transmit over the noise.
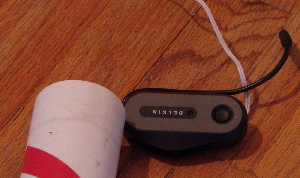 The transmitter once modified will transmit 200' which is the maximum allowed by the FCC without a license. The sound quality is very good.
The next challenge with this transmitter was putting it outside. It was not designed to be out in the weather. So an enclosure was made. It just so happens to look like a North Pole.... PVC is used for the pole and a coupling and cap were used for the mid junction and the top cap. The bottom of the pipe was cut to a point so it could be stuck into the ground. At about 2' off the ground The pipe was cut so the point once frozen into the ground could be left there and still allow the top to be removed mostly for battery replacement. This held up great ffor the 2006 and 2007 seasons and will probably used for several years to come.
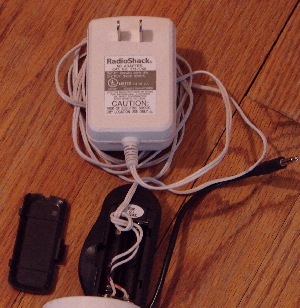 During the first week over a dozen battries were used so a Radio Shack 3VDC power source was used. It has been soldered to the battery terminals inside the Belkin battery holder. Then a small notch was cut into the cover to allow the wire to exit. To allow the transmitter to be mounted closer to the street a 100' cable was made to extend the stereo output of the computer to the middle of the front yard. It uses 2 conductor shielded cable and a male and female 1/8" stereo jacks from Radio Shack.
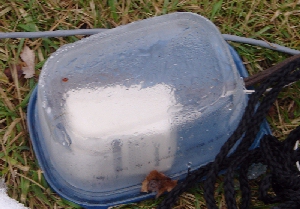 The wallwart power supply is hooked up to my static channel on my LOR setup. This connection was tucked away nice and dry in a food storage container with a small notch cut into it fot the wires. It looks like its all wet in the picture but it is actually dry the water is on the outside.
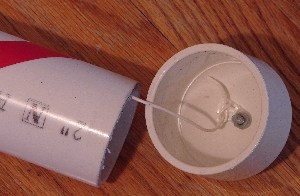 I tuck the tunecast up inside the 2" PVC pipe and suspend it with the antenna. This is tied in the cap to hold it up which also keeps the antenna nice and stretched out..
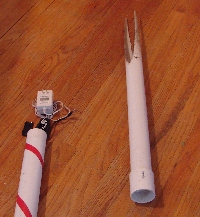 When the ground is still warm I gently hammer the base into the ground. it is made from 2" PVC cut to a point. It works fairly well but if it comes out after the ground is frozen it's not going back in without breaking it. Next year I'm gluing 1/2 PVC to the inside and using a 1/2 re-rod stake.
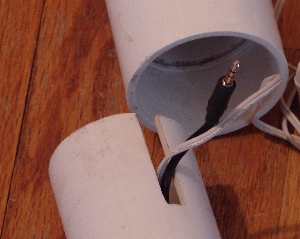 In the bottom of the north pole PVC I cut a slot into it so the cords can exit. I made the pole to come apart like this because originally I had to be able to turn the transmitter on and off and to replace the batteries. Unfortunately the batteries had to be replaced every couple of days. So I switched to the wallwart from Radioshack. Now it is hooked to the static channel of my Light O Rama setup.

